BGINFO - A Posh Recreation
Recently I have been building a lot of Windows Servers in different environments - one
I like Chromebooks! They are cheap, light, easy to use and have great battery life. But they can also be quite limiting sticking to Chrome OS if you need to do some real Dev work.
For the most part Chrome OS is good enough for me. I run a lot of Virtualized Hardware (ESXi) and this can be accessed with the new Web UI in version 6.5, which includes Console so I can interact with the virtual machines. Other tasks are mainly on headless machines so I can just ssh on to these.
But there are times when I need a ‘fuller’ OS, one that allows me access to all the tools and software I need. For this I used to carry around my main laptop, but this was becoming old itself and as a 17” laptop it wasn’t lightweight either. So I decided to upgrade my Chromebook and set it up so I could run any OS I needed to on it, whilst maintaining the lightweight Chrome OS.
These steps are for an Acer Chromebook 14 CB3-431 but should be repeatable on other modern(ish) Chromebooks.
WARNING - Some of these steps require flashing new firmware and changing to developer mode. Each step SHOULD be reversible, but follow these steps at your own risk
We need to get in to developer mode. As I said in the intro I want to maintain the Chrome OS and this means we don’t have to open the case and set the RW mode :) What it will do is perform a full reset as part of the process.
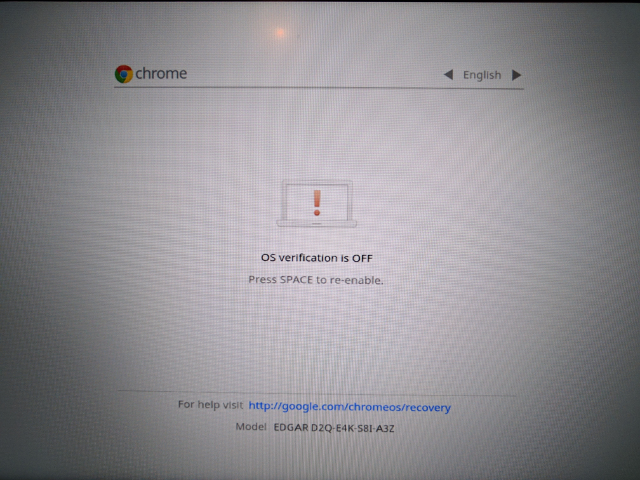
To enable developer mode power on the device, once booted press and hold the ESC and Refresh buttons then tap the power-button. The Chromebook should reboot to a white screen that says Chrome OS is missing. Press CTRL+D and then Enter to turn off OS verification.
Once the Chromebook reboots to a white screen press CTRL+D again to boot into Developer mode. The first time it should tell you its Transitioning into Developer Mode. For every subsequent boot you will need to press CTRL+D whenever you see the OS Verification page in order to boot.
With developer mode now available to us we need to put a new RW_LEGACY firmware on to the device that will allow us to boot from USB devices. Fortunately this has all been made very simple for us. Head on over to https://mrchromebox.tech/#fwscript for all the details.
For my setup I did the following.
cd; curl -L -O http://mrchromebox.tech/firmware-util.sh && sudo bash firmware-util.shAfter the download completest you should see a screen similar to the one above. Select Option 1 to Install/Update RW_LEGACY Firmware then R to reboot
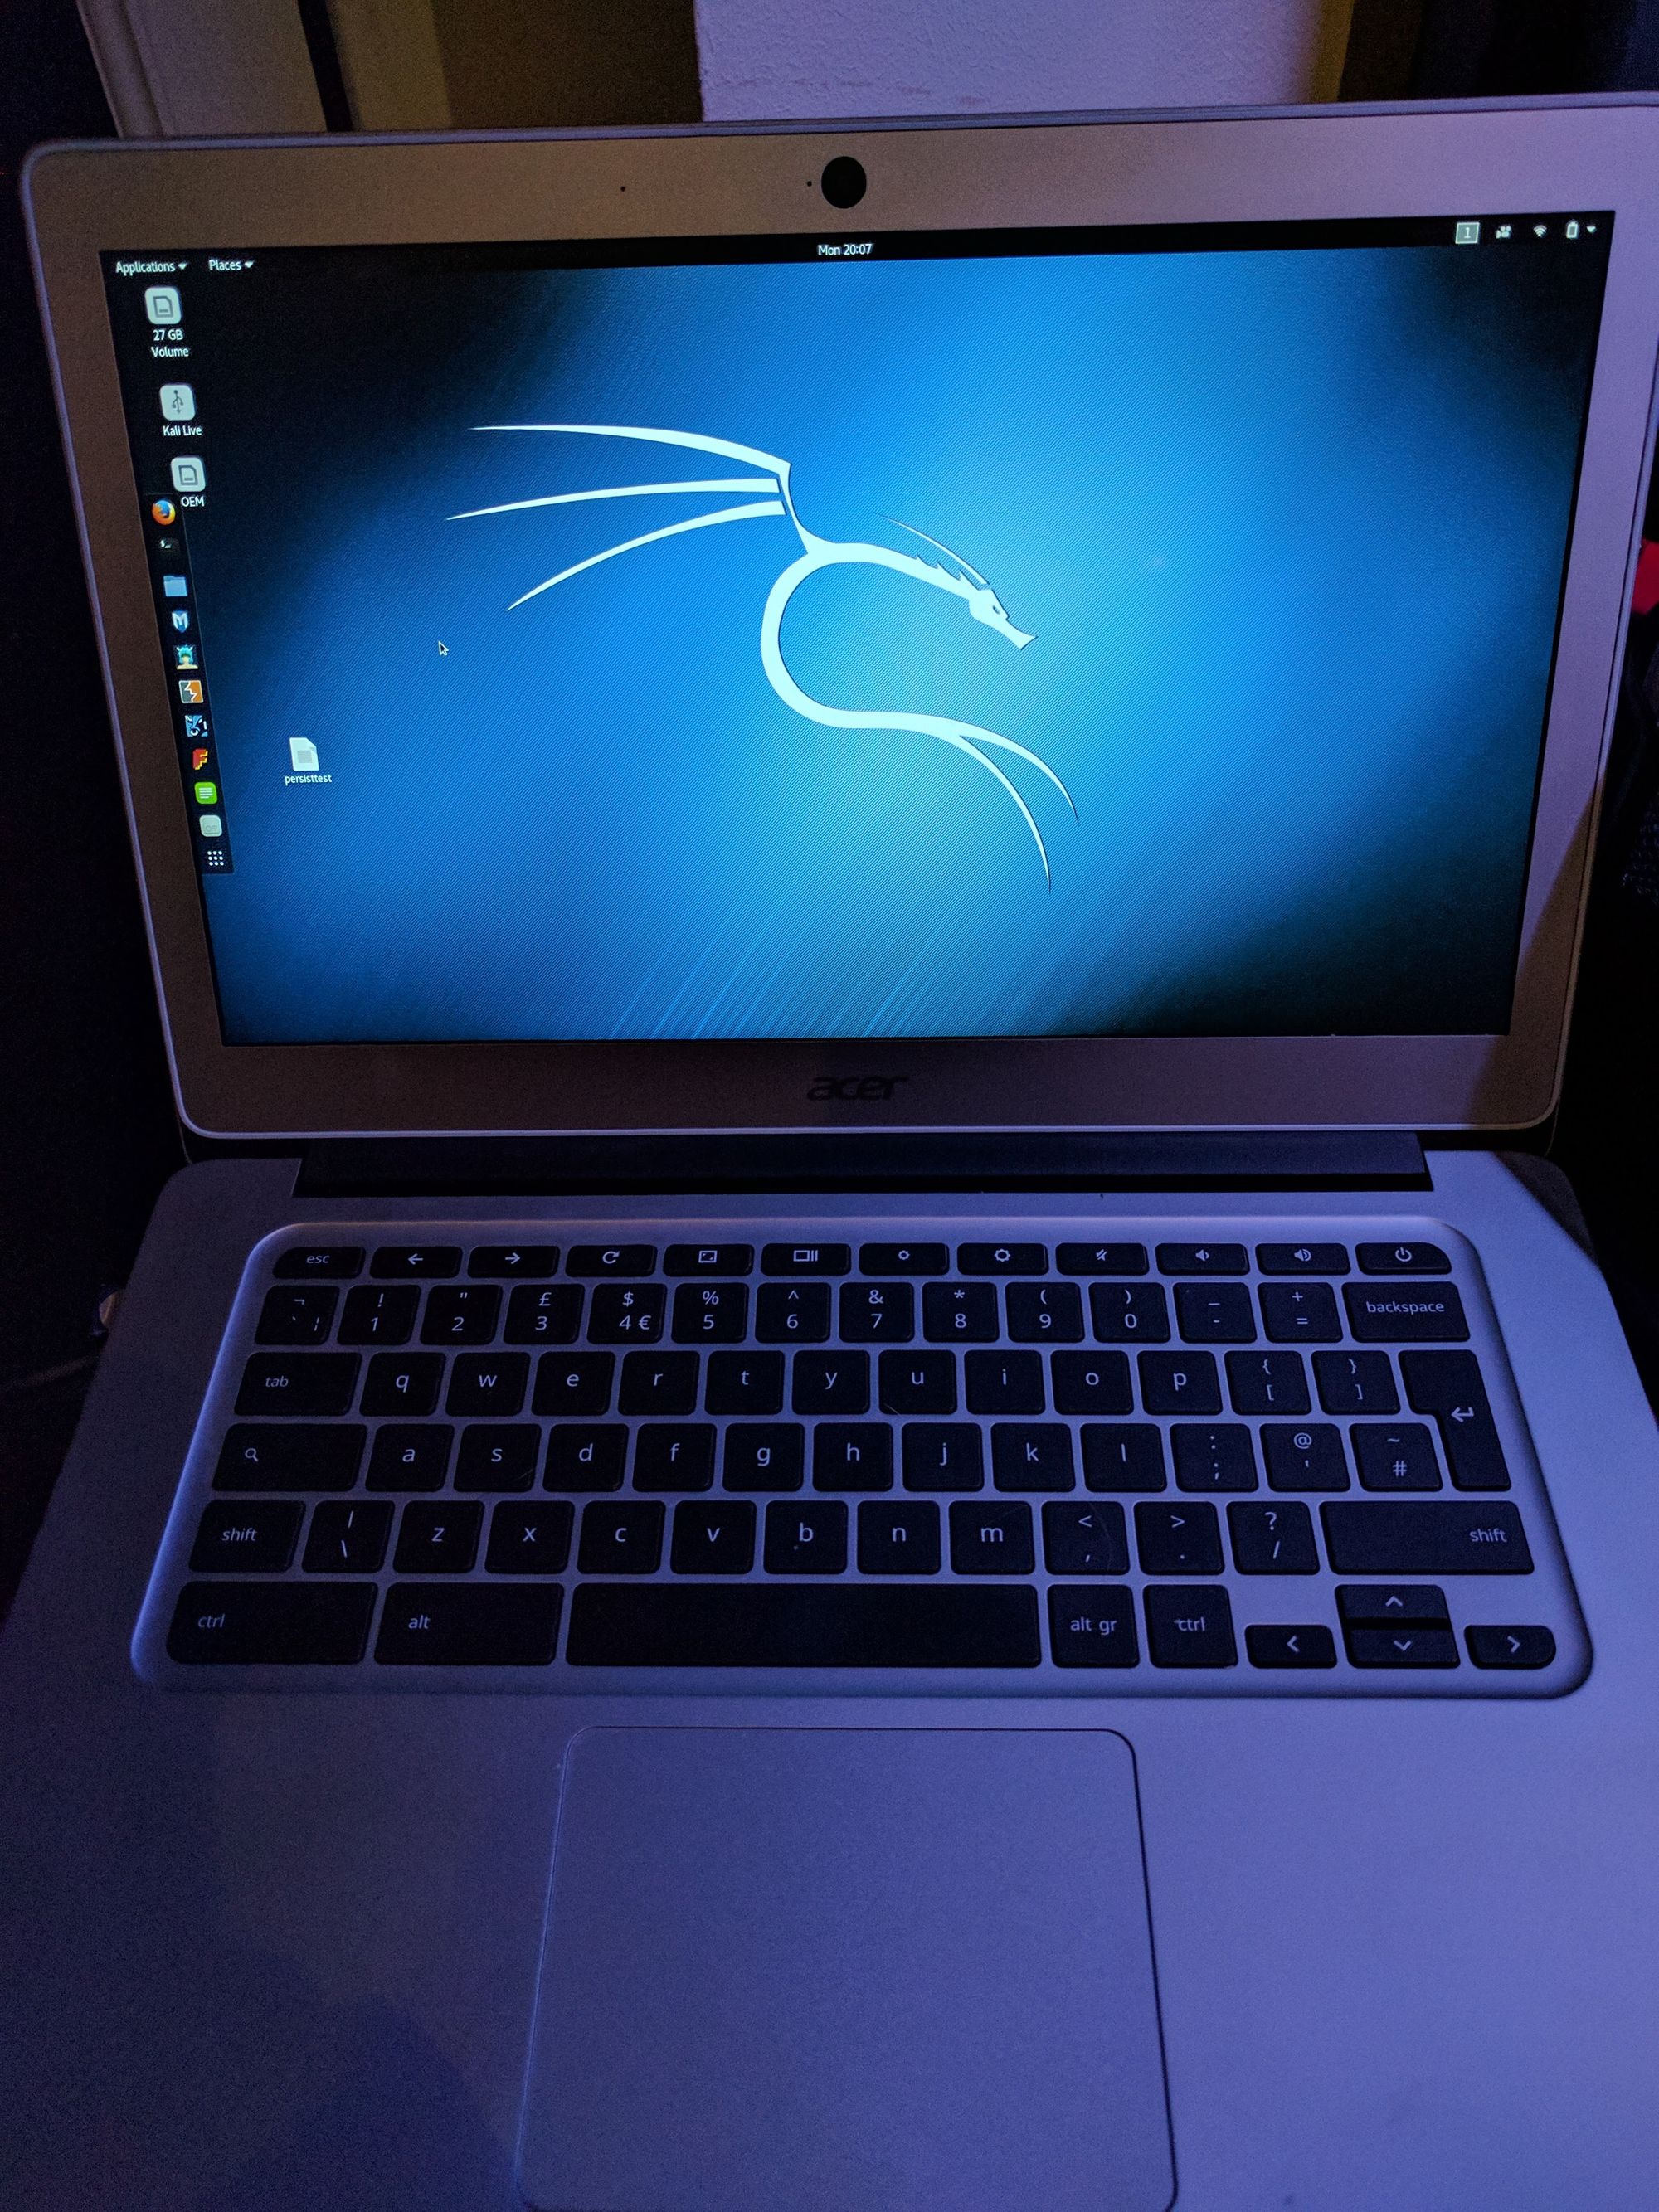
Prepare a USB device with your OS of choice. In this example I’m going with a USB persistence install of Kali. I prefer to use the SanDisk Ultra Fit devices they are USB3 and their low profile means they are not hanging out of the USB port waiting to get caught. I have a 64Gb USB 3 for running Kali and a 128Gb USB 3 with a standard Ubuntu build.
To create the bootable USB I pretty much followed the official guide. http://docs.kali.org/downloading/kali-linux-live-usb-persistence Instead of the command line parted option at step 2 I fired up gparted and created the partition myself.
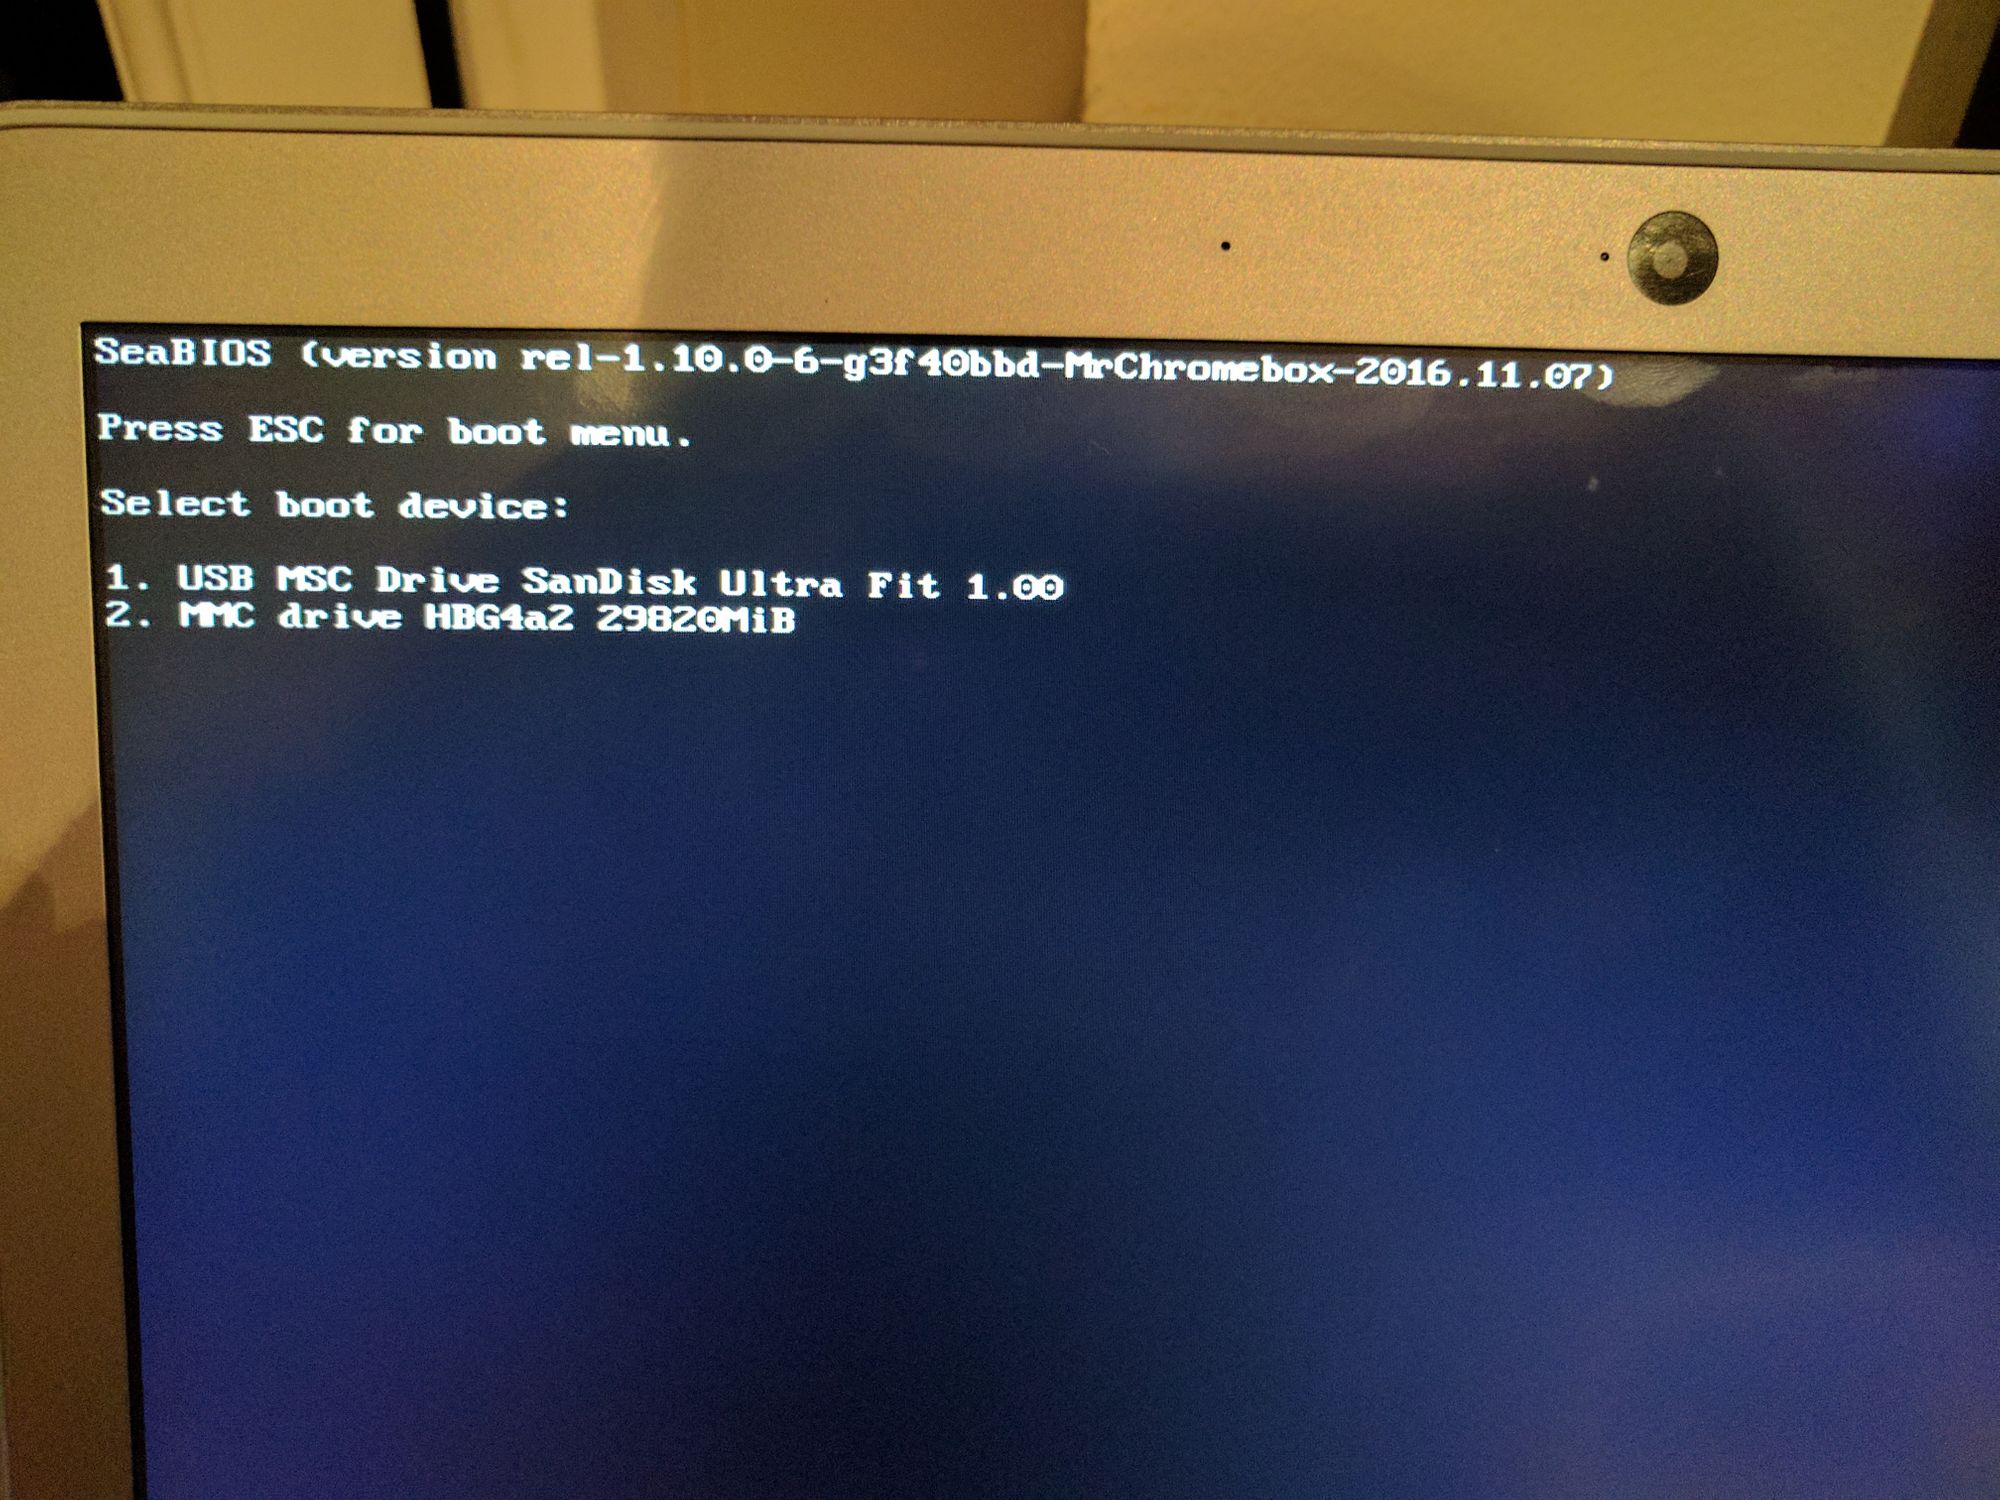
Now for the easy bit. Plug in the USB drive with your OS in to the Chromebook and power on the device. Once you see the white OS Verification screen press CTRL + L and then ESC and you should get to a typical boot menu where you can select the USB device by number.
Select Live USB Persistence from the Grub Boot Menu, give it a few seconds to boot and you should be greeted with your new OS.
If you want to boot to Chrome OS just reboot and press CTRL+D at the OS Verification page instead of CTRL+L